
Disclaimer – This article is a general how to use our products and is not intended to be a final installation guideline. You must always consult an engineer for site-specific installation guidelines and state-specific requirements.
The reflective cracking problem
Reflective cracking on road surfaces is a major issue and an expensive problem for the transportation industry. When the cracking starts it’s like dollar signs forming on the roadway. So, the question is – can you stop it from happening? Let’s just be honest, NO, you can’t completely stop it. Seasonal changes, drainage issues, and heavy loads are some of the external factors that deteriorate a road surface. Though, like most things in life, we need to look at the internal factors that cause long-term problems. When it comes to reflective cracking the problem almost always starts from inside the roadway. While we can’t completely stop reflective cracking, we can reduce it significantly through innovative products.
Nonwoven geotextile fabrics to the rescue!
Using a nonwoven geotextile fabric for an unbonded concrete overlay addresses the internal issues that cause reflective cracking. These issues are primarily temperature differences between two surfaces and protection against subgrade shifting/cracks. While most public agencies are in agreement that an unbonded concrete overlay is a great option, some still balk at the additional cost and work. The cost of the separating layer can be greatly reduced by using a nonwoven geotextile fabric rather than the traditional 2-inch asphalt layer. Also, the installation is actually quite easy (as we will explain below). These fabrics are not only less expensive and faster to install, but they also provide excellent drainage. In the end, the time and cost put into doing it the right way will pay-off greatly in the long term savings.
Installing an unbonded concrete overlay using geotextile fabric
Let us show you how easy the installation is and provide a few useful tips along the way. In our example, we will be using our Stronghold 14oz. Bond Breaker Fabric.
Step 1 – Prep the surface
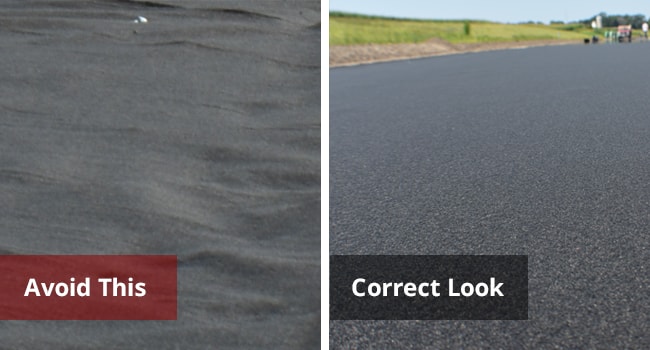
It’s critical to fully clean and level the subgrade. This includes filling existing cracks and sweeping the roadway free of any dirt and debris. Below is a visual example of what you want your surface to look like with the fabric installed. It should be as flat as possible.
Step 2 – Apply Geotextile Fabric
Unroll the geotextile fabric onto the existing roadway and straighten it out by hand as you go. Make sure you meet your minimum overlap on seems, this is determined by an engineer on a per job basis. One final note, do not turn rubber tire equipment on top of the fabric surface, or it can cause folding that can compromise the separating layer.

Step 3 – Fasten the Geotextile Fabric
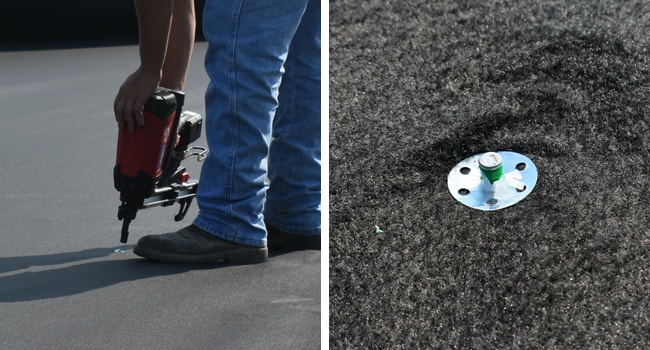
After you have straightened out the fabric on the roadway and made sure there are no lumps under the fabric, you can fasten the fabric to the subgrade. There are two ways to fasten the geotextile fabric – with direct fasteners or adhesive. In this example, we are using direct fasteners. Please note, there is a maximum of six feet of spacing for fasteners.
You’re Done!
That’s all there is to it, but make sure you put the proper amount of time into prepping the subgrade surface. The preparation will make all the difference in the final results. The applied fabric should look something like the photo below. You are now ready to add reinforcement dowels or wire for the concrete pavement.

See the installation in action
Want more information?
We would love to help answer any additional questions you have about specifications or application. Contact us below or browse our products.